今回は、機械学習のパイプラインについて紹介します。
パイプラインの概要とPythonを使用しパイプラインを実装する方法を解説します。
動画で詳しく学習したい方はこちらもおすすめ
目次
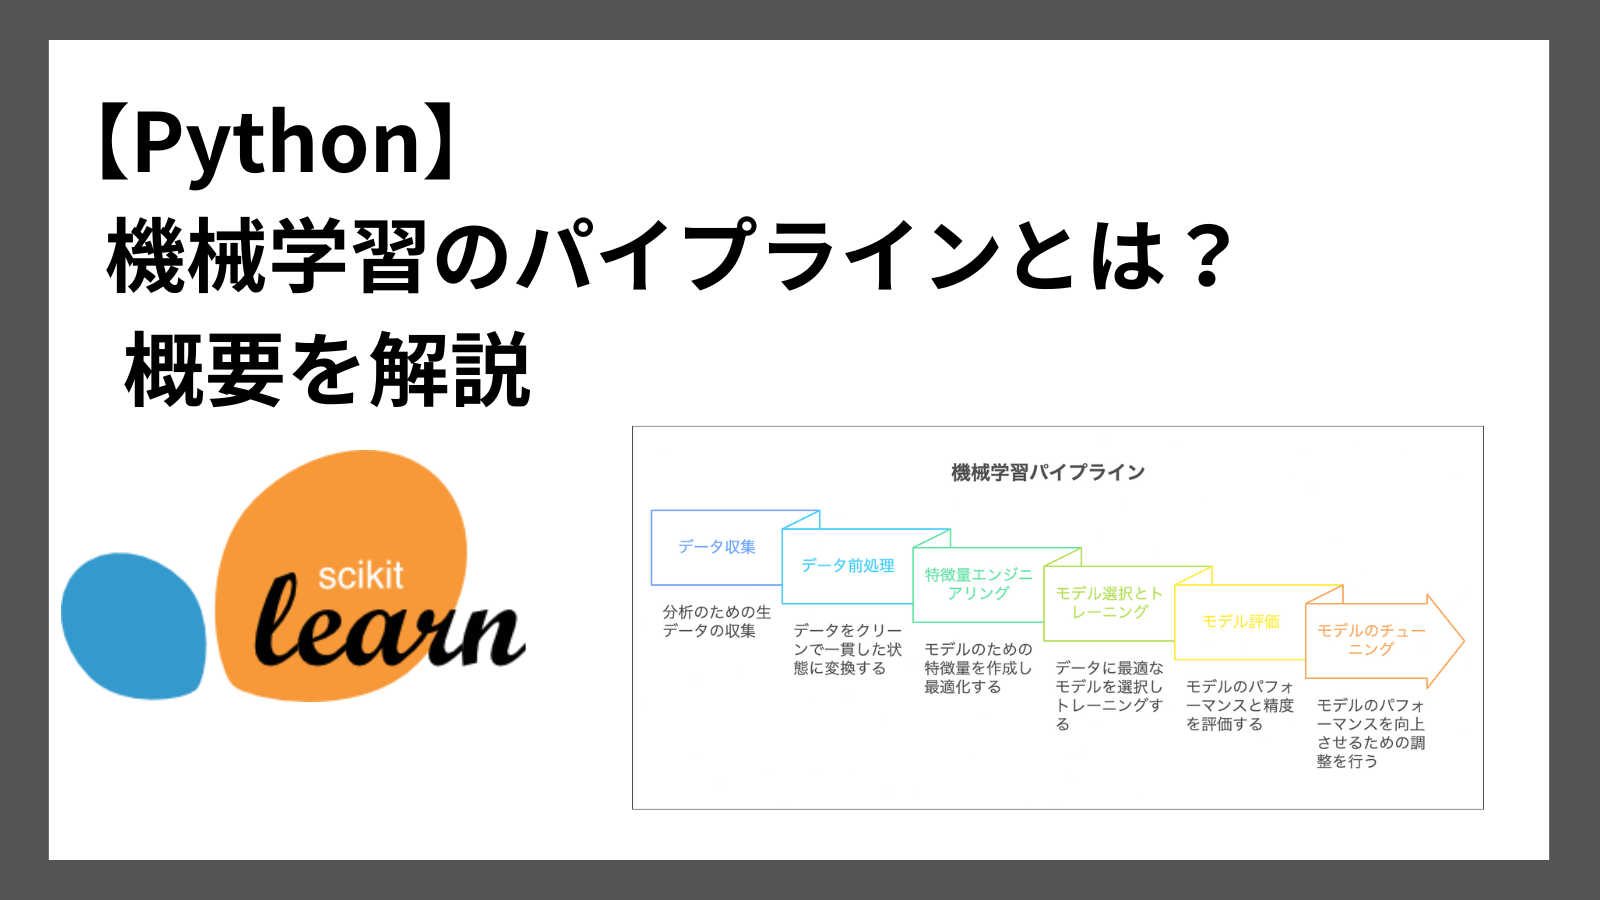
機械学習のパイプラインとは
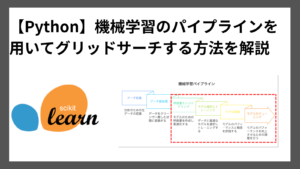
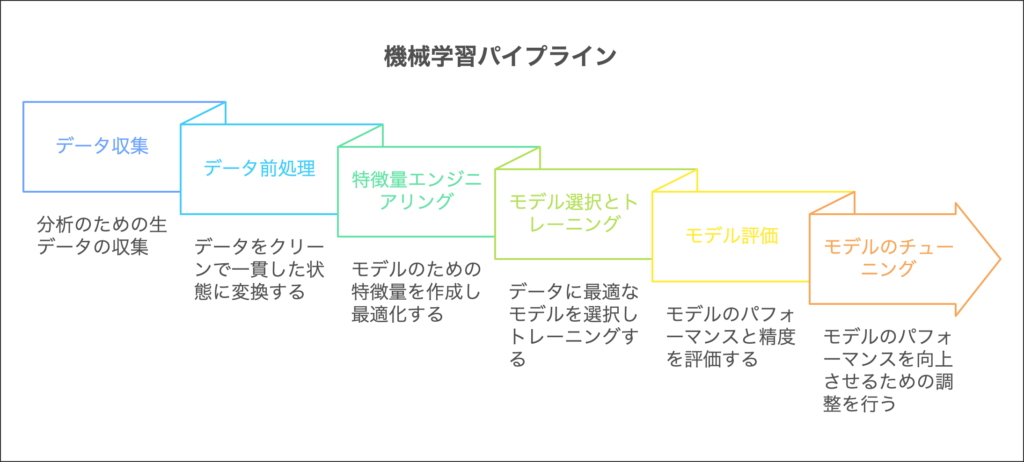
機械学習におけるパイプラインは、データ収集からモデルのチューニングまでの一連の流れを自動化するプロセスのことをいいます。
これにより、機械学習プロセスの簡略化や再現性の向上が見込まれます。
Python実践 パイプライン
早速Pythonでパイプラインを実装してみましょう!
Pythonでパイプラインを実装する方法は以下の通りです。
from sklearn.pipeline import Pipeline
Pipeline(steps, memory, verbose)
Pipelineのパラメータの説明は以下の通りです。
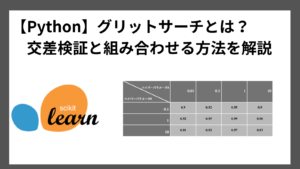
| パラメータ | 説明 | デフォルト |
|---|---|---|
| steps | リスト形式で処理を指定 | |
| 処理はタプルで(名前, ステップ)指定 | – | |
| memory | キャッシュ使用するかを指定 | None |
| verbose | 各ステップ実行時に詳細な出力をするか | None |
Pipelineを使用したサンプルコードは以下の通りです。
「標準化」と「ロジスティック回帰」をパイプラインで実行します。
from sklearn.pipeline import Pipeline
from sklearn.preprocessing import StandardScaler
from sklearn.linear_model import LogisticRegression

# データの読み込み
iris = load_iris()
X, y = iris.data, iris.target
X_train, X_test, y_train, y_test = train_test_split(iris.data, iris.target, test_size=0.2, random_state=42)

pipeline = Pipeline([
    ('scaler', StandardScaler()),
    ('classifier', LogisticRegression())
])

# パイプラインを適用
pipeline.fit(X_train, y_train)
# 予測結果を取得
predictions = pipeline.predict(X_test)

print("予測結果:", predictions)
実行結果
予測結果: [1 0 2 1 1 0 1 2 1 1 2 0 0 0 0 1 2 1 1 2 0 2 0 2 2 2 2 2 0 0]まとめ
機械学習のパイプラインについて紹介しました。
機械学習パイプラインは、データ収集からモデルのチューニングまでの一連の流れを自動化するプロセスのことです。
パイプラインをPythonで実装する方法は以下の通りです。
from sklearn.pipeline import Pipeline
Pipeline(steps, memory, verbose)
ここまで読んでくださりありがとうございます。